
Table of Contents
Quick Scenarios
There are six quick scenarios available in Intact.Design. Programmed loads and restraints are placed on the object depending on which scenario you select. There are a few options you can change, but Intact.Design does most of the work for you! For more advanced setup, check out the stress scenario page. For vibration and frequency analysis, see the vibration scenario page.
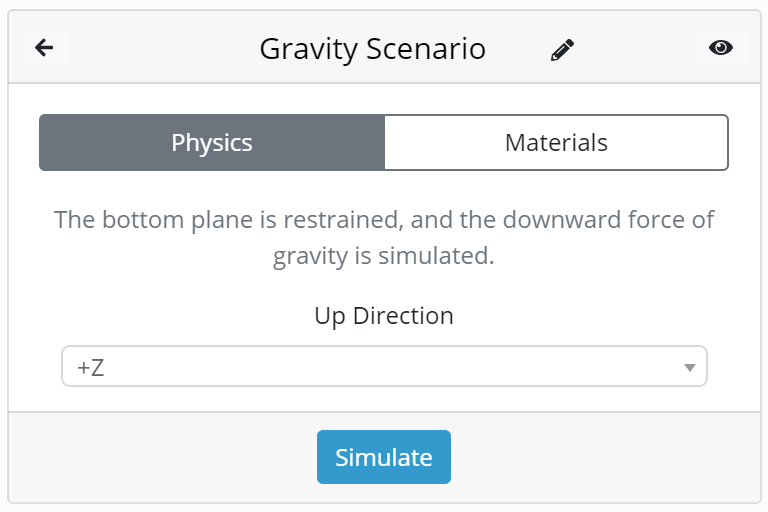
Gravity
Intro: The acceleration due to gravity is approximately 9.81 m/s/s or about 32.2 ft/s/s. A force is defined to be a mass times an acceleration. The acceleration is defined to be gravity and the mass is calculated from the density of the material and the volume of the part. Any object made must be able to withstand at least this amount of force. Issues tend to arise in larger, more complex structures, due to the weight and loads the supports take.
Controls: To setup a gravity simulation, the user must specify the “up” direction and the material. Once the material is chosen, the density and part volume define the mass, which in turn defines the force due to gravity. The force of gravity is always applied in the “down” direction. Additionally, the computer automatically restrains the “bottom” faces.
Usefulness: Often structures will be most affected by gravity. Things like bridges and buildings will contain other loads from people and vehicles, however, the most significant forces will be due to gravity.
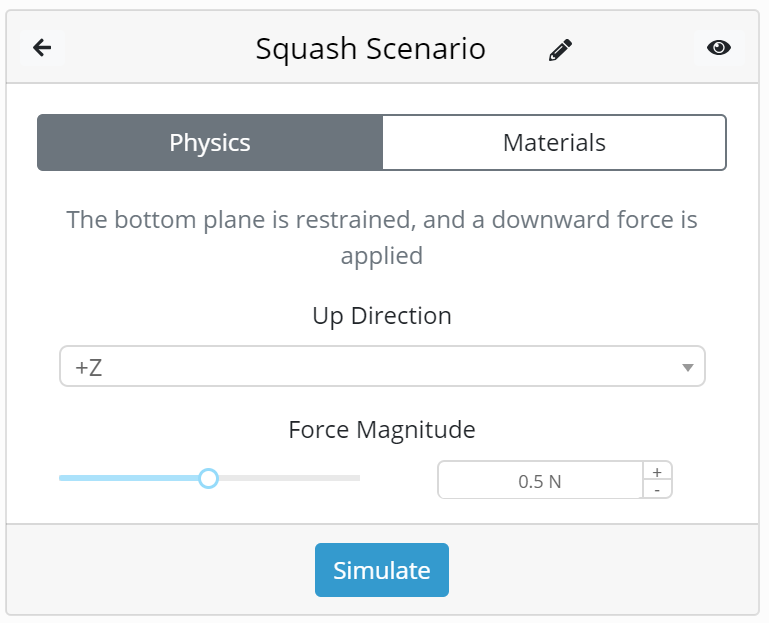
Squash
Intro: This is a simulation in which an object is pressed against the ground. A vertical force is applied to the top surfaces of the model in the downwards direction, which “squashes” it.
Controls: The user must select the force magnitude and an “up” direction, and the program restrains the bottom surfaces then applies the load. The forces are automatically applied to the highest faces. It is important to note that for a chair for example, the load in this scenario would be applied to the top of the chair, not the seat (If you wish to have more control, see Advanced Scenario). To change the direction of the force, change the “up” direction. The force will always point towards the restrained faces (ground).
Usefulness: This scenario is good for simulating the force of an object being placed on something else. Examples could be books on a table or people on a small bridge.
 Back to Top
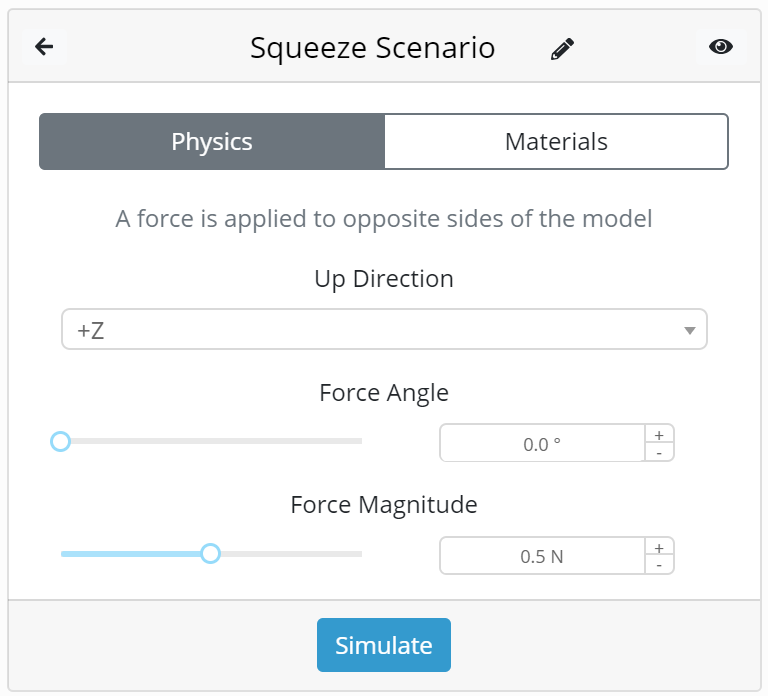
Squeeze
Intro: Two equivalent forces are applied to opposite ends of the model. The forces are equivalent, so they squeeze the model without moving it.
Controls: To start a Squeeze scenario, the user must specify the “up” direction, force angle, and force magnitude. The forces applied are defined to be equivalent. The plane of rotation is normal to the “up” direction.
Important note: It is very important to realize that this scenario doesn’t actually apply two forces to the model. For every FEA (finite element analysis) program, a restraint is needed. That said, the equivalent situation to squeezing an object is to apply one of the forces and restrain the other side. The program does this by choosing a restraint based on the orientation of up. It is important to know where the restraint is, because this will impact the results in a way that may render the solution useless.
| Up | +/- X | +/- Y | +/- Z |
|---|---|---|---|
| Restraint | +/- Y | +/- X | +/- X |
To figure out how the model will be run when you change the angle, find which force of the pair is the actual applied force and which force of the pair is really the restraint. Now, as you change the angle that the forces are applied on, this will change the angle of the restraint. So if you define +Z to be up, the initial force will be on the -X side pointing to the +X side. This means the restraint is on the +X side. When you rotate the force 90 degrees, the force will be applied on the -Y face and the restraint will be on the +Y face.
Usefulness: A squeeze scenario can be useful for both machines and objects that get gripped by either a person or a machine.
 Back to Top
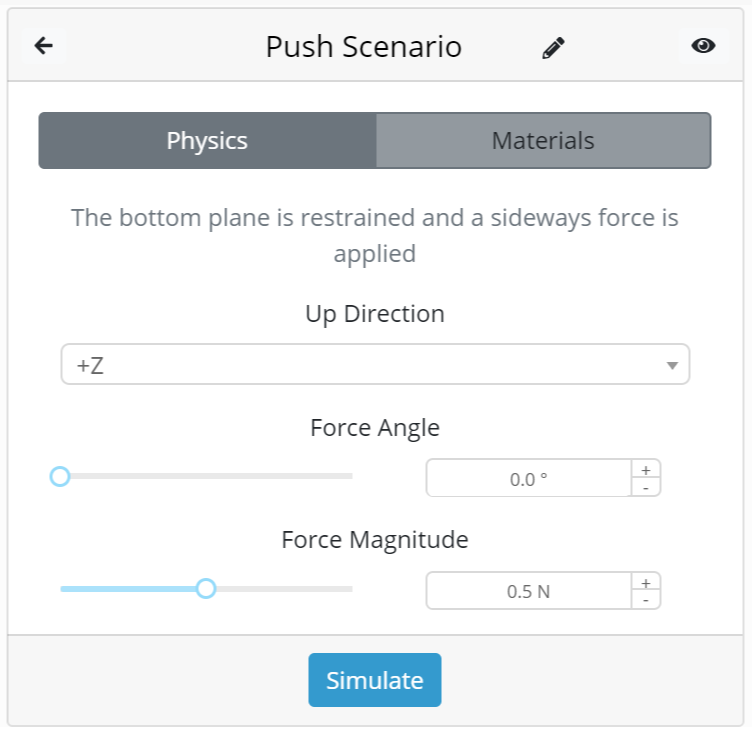
Push
Intro: One force acts upon the side of the model, and the bottom faces are restrained. This is a very general scenario with many applications.
Controls: The user must specify “up” direction, force angle, and force magnitude. The “up” axis is used to define which faces are the bottom faces, and the user has the option to change the angle the force is applied at. The angle rotates the force about the “up” axis.
Usefulness: This scenario applies whenever you try to slide something on the ground. Additionally, supports and structures need to be able to withstand a certain amount of wind, which can be modeled as a pushing force.
 Back to Top
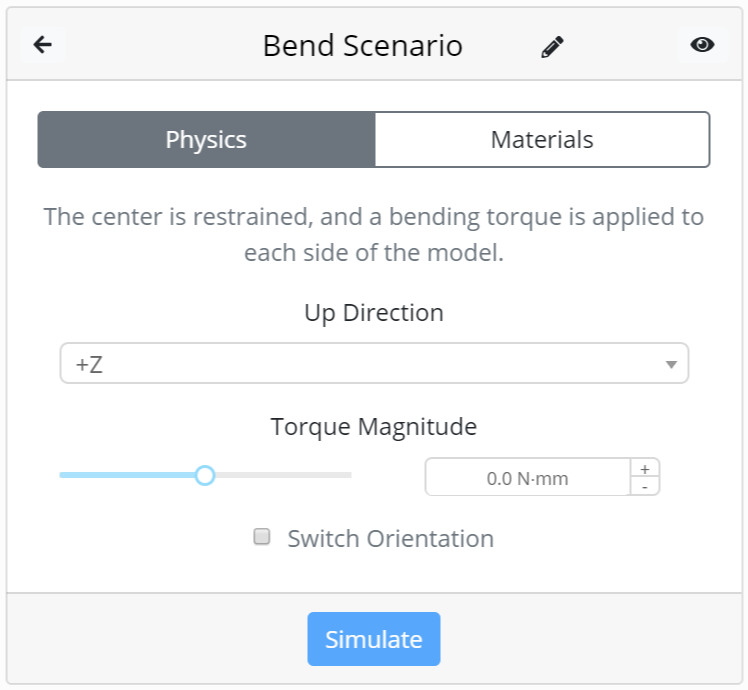
Bend
Intro: This scenario applies equal torques to opposite sides of the model. This causes the model to either elongate or bend, depending on the application.
Controls: First, specify the “up” direction, which will define the axis around which the torque is applied. Use the slider to adjust torque magnitude. Switching the sign (+/-) of the magnitude changes the torque from clockwise to counterclockwise, or vice versa. The “switch orientation” button changes the direction of applied torque by 90 degrees. The restraints are applied to several of the faces near the centerline of the object (as defined by the two faces the torques are applied to). Intact does this automatically, and cannot be changed by the user. To apply more specific loads and restraints, see our stress scenario guide
Usefulness: Bending occurs in many straight, long members like trusses on a bridge. In any situation where a load is not symmetrically distributed or if the restraints aren’t symmetric, there will be a torque caused, and it may be possible to use this scenario.
 Back to Top
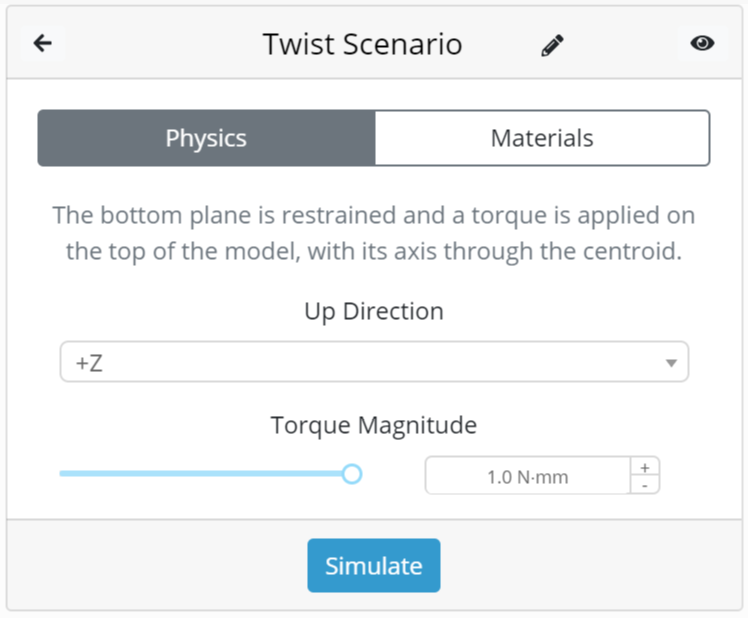
Twist
Intro: Twisting is when a rotating force (a torque) is applied to one of the object’s faces. In this case, the bottom plane is restrained while a torque is applied to the top surface of the model.
Controls: As with the other scenarios, to change the face the torque is applied to, change the “up” direction. To change the direction of the torque (clockwise vs counterclockwise), change the sign of the torque magnitude (+/-). The bottom faces of the model are restrained.
Usefulness: This scenario can apply to anything that spins. Examples include opening a jar, screwing a screw, or opening a doorknob.
 Back to Top
Related Blog Posts
Related Tutorial Videos
Watch this beginner's tutorial video from 3:22 to learn more about the six quick scenarios.